Wednesday, September 5, 2012

She's nesting.

Just over three weeks ago, I went to collect one of Cambridge's eggs, and discovered the egg was sitting in what appeared to be a nest. I hesitated, remembering back to what I had read online regarding Indian Runner Ducks and nesting. All written sources advised that this breed of duck lays on the run, hardly ever sits on their eggs, and if they do, won't stay on them for the duration of the incubation period.

I decided to leave the egg in place and let her try.


Over the past three weeks Cambridge has been a perfect mother. She has built herself a warm, cosy and safe nest up close against the base of the banana tree. Cambridge sits on the eggs most of the day, and only leaves them for food, water and a little bit of exercise. As she prepares to get off the eggs we watch her pull the surrounding straw towards her with her beak, and covers the eggs with the straw as she gets up. This keeps the eggs nice and warm while she is away from them.


As the hatch day nears, we thought we should move their nesting box closer so she has somewhere safer to take her babies if she needs to (remember the nesting box I built that the ducks never used?). I new I had the perfect way to tempt her and Oxford away from her eggs. Shell pool!!!


While her and Oxford splashed around, I made some coop modifications. I had to remove this tree from the coop as it was in the space I needed to put the nesting box. Jamie offered me a saw to chop it down, but I just snapped it clean off with my foot (#farminglife).


I was really nervous that all my fiddling about might have put her off sitting back on her eggs. We sat and watched the ducks for a nervous 10 minutes. When they returned to the coop Cambridge did not appeared at all concerned by the newly erected building next to her nest. She snuggled down back on her eggs...

Can you spot her up there behind the banana tree trunk?

Yesterday evening Jamie and I held a torch up behind one of the eggs (candling), and we could see all sorts of dark shapes - oh!!! - I think there is a duckling inside!!!

~ Image from here ~

We saw something very similar to this, so by our calculations we think they should hatch by this weekend!

Sam xox

Tuesday, September 4, 2012

In the garden.


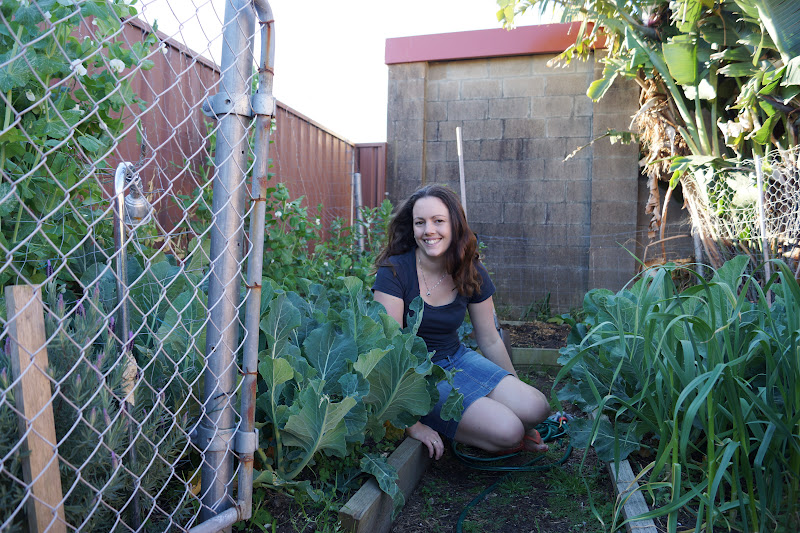
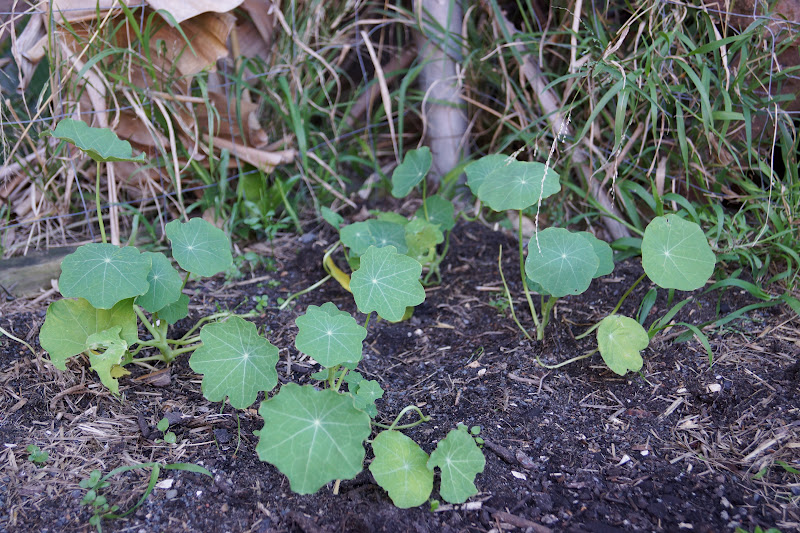
A lot has happened in my garden this week. Carrot seeds that were scattered a few weeks ago are beginning to sprout. Radishes planted from seed are performing far better in the garden bed than they did in the pots. My chickens had a day roaming free in the garden when I accidentally left their gate ajar. They completely wiped out what remained in my herb garden (fortunately I had moved a lot of the herbs into pots in preparation for summer), so this wasn't too heart breaking. However, they also went to town on a pot of nasturtiums I had grown from seed; eating every single leaf off of every small plant. Now all I have left are a bunch of stems. I am really hoping the plants recover as the seeds were not cheap.

My broccoli has almost finished, with the final few side shoots ready for picking. My cauliflower is still all leaves. I peeped deep down into the one that receives the most sunshine and gently, peeling back a few layers of leaves, I found a tiny white flower head no bigger than my thumb. Yes!

The lavender has come into bloom and the bees are flocking to sample the nectar. Orange carrot tops are peaking through the soil, flowers have appeared on the broad beans, and a wall of pea-green stems and white flowers line my veggie patch. It would seem that the winter harvest has not yet finished in this little plot of earth!


Sam xox

Thursday, August 30, 2012

The wool issue.


I never buy Country Style magazine (Australia), but when I spotted the cover of the latest issue, I just couldn't help myself. Look at that cute little lamb! In a living room! And the large knitted chair cover? Gorgeous. I was sold.

Silly me though didn't take the time to actually look inside the cover. You know the old saying, "Don't judge a book by its cover?" This magazine was really disappointing. For a country like Australia that has such a strong history of wool growing, it was sad to see it shrunk into a couple of really short articles, pages of expensive fashion modelled at a wool farm, no actual patterns for how to make any of the items features, and worse of all, that lamb was SUPERIMPOSED on the cover!!! Oh the shame!

Ok, now that's off my chest, how about I share with you some REAL wool images - no superimposed lambs here...

This is the leftover scraps of the Merino wool I had been spinning up. One of my bobbins ran out far quicker than the other while I was plying, and as I only have three bobbins, I was forced to unravel the remaining bobbin. This is what resulted.


I will definitely keep this little pile of twists, as I am sure they can become a quirky feature in a future woollen project.

This here is my second blended Merino tops that I bought from Feltfine. This one is called Bumble Bee and is a combination of Merino raven and jonquil, blended with black diamond bamboo and natural soy bean. It is this method of blending that creates the gorgeous bumble bee effect.


I bought 600g of this tops with the hope that there will be enough to knit a sleeveless button up vest with.

And I have saved the best until last. This was NOT on my shopping list when I arrived at Feltfine, but after Gary showed it to me and allowed me to handle it, I was sold! This beautiful bundle is multi-dyed mulberry silk tops.


Isn't it all just glorious?

Anyone tempted to learn to spin now?

Sam xox

Tuesday, August 28, 2012

Spinning up Aries.

Here is the first of the blended Merino tops I bought from Feltfine, and it spun up absolutely beautifully!

" Aries is a combination of dyed Merino wool tops scarlet, crimson, hot pink, ruby with extra bleached tussah silk to create a rainbow blend with a silky sheen. "


I bought 200 grams of the tops and weighed it out using digital scales to make two 100 gram bundles. I then spun two bobbins, with 100 grams on each. The wool spun beautifully with the different colours scattered throughout the bobbin. The yarn is then created by plying the two bobbins together.


Once the bobbin is full, the yarn is removed and wrapped around a wooden niddy noddy (I couldn't make that name up if I tried!) to help even out the tension.


The yarn is secured in place with four tie, is then removed from the niddy noddy, and twisted tightly to create a skein!

~ Those large white lines are the ties on the skein, not part of the actual yarn ~

200 grams of the wool gave me two and a half skeins of wool!


Isn't it beautiful? I am so pleased!!!


Sam xox

Monday, August 27, 2012

Visiting Feltfine.

Last week I had the pleasure of visiting a lovely gentleman named Gary at his Hunter Valley Alpaca farm! He is the proud owner and operator of the online store Feltfine. Gary supplies spinners, weavers and knitters with a variety of the best quality products. In the virtual store you can purchase fleeces, tops, fibre, and yarns in a wide variety of colours. Feltfine ships internationally so anyone can shop there.

After having spent weeks spinning up pure white Merino wool, I needed to add some colour to my spinning repertoire. I had browsed a number of online for Australian-based fleece suppliers before I came acros Feltfine. When I clicked through to the online store, what immediately jumped out to me was the huge range in the competitive pricing. The prices per 100 grams were a lot cheaper than other online suppliers I had checked out. I was also impressed by the wide variety of products that were available. My favourite with out a doubt was the blended Merino tops - oh the colours! A few emails were sent back and forth, and I was invited by Gary to collect my order in person, as I work only 20 minutes from his farm.


Gary's farm could have come straight from a Hunter Valley postcard...


As I drove along the driveway up towards the property the Alpaca's followed alongside my car...


Gary was waiting as I arrived and made me feel most welcome. He showed me his whole range of products. I got to view a rainbow of fibres stacked floor to ceiling, a wide variety of Alpaca yarns, and even an industrial-sized picker and carder! Gary is an enthusiastic spinner and was able to give me advise about all the different fibres he stocks. I got to handle Merino, Alpaca, mohair, and even silk (so so soft!). We chatted for a while and then it was time to go...


I have been spinning up a storm and will reveal all later this week...


On a side note, I purchased this basket from my local organic store. It is handmade by women in Africa, endorsed by the Fair Trade Federation, with the proceeds going back to their communities. I have found some similar baskets online that are available here if you would like your own. As you can see I use mine to store my spinning stash!

Sam xox

I am in no way affiliated with Feltfine. Opinions expressed in this post are purely my own personal ones, and I am in no way benefiting from this post. I only want to share my Feltfine shopping experience!

Sunday, August 26, 2012

In the garden.

 ~ Onion chives about to flower ~

~ Newly planted Nasturtiums will hopefully attract good bugs to my summer garden ~ 

 ~ The girls aren't missing a beat ~

 ~ Radishes sprouting alongside the cauliflowers ~

 ~ Through the wire ~

~ My biggest broccoli head yet ~

~ A bath tub of peas ~

Sam xox

Saturday, August 25, 2012

Potatoes.

This year for my potatoes I tried out a method I saw Alys Fowler use during her Edible Garden series. She grew potatoes in pots on her patio in an attempt to save on space. Film vision showed Alys tipping out said pots causing a cascade of dark soil and golden tubers. What success she appeared to have! 

I decided to give it a try for myself.


This terribly grainy photo above shows my potato haul around this time last year. I had buried the potatoes in my front garden as there was plenty of space to grow a decent sized crop. And yes the crop did do reasonably well. However, it was evident from the size of the yield that the plants did not get enough sunlight in this position.

This year I planted five potato halves in some good quality compost in the base of a large black plastic pot. I had read that if you plant the potatoes at the base with enough soil to cover, you can then add more and more soil as the plant grows, and this encourages the tubers to be produced all the way up the pot. It appears that I did not do this quickly enough, I allowed the plants to become established before I piled more soil on top of them, with this resulting in potatoes only to be found in the bottom half of the pot.

My dear friend and gardening soul mate Mel did the honours...


I am definitely going to plant my potatoes in pots from now on. Once planted they do not take a lot of work, and if I do the soil addition correctly next time, I should yield a whole lot more delicious potatoes.

Nothing beats a home grow potato! We steamed some last night steamed to have with dinner. They were served with sliced shallots and some salt and pepper.

Sam xox